
This how-to article will walk you through setting up a base Splunk Cloud Enterprise environment using the Splunk Cloud Enterprise Light license:
Step 1:
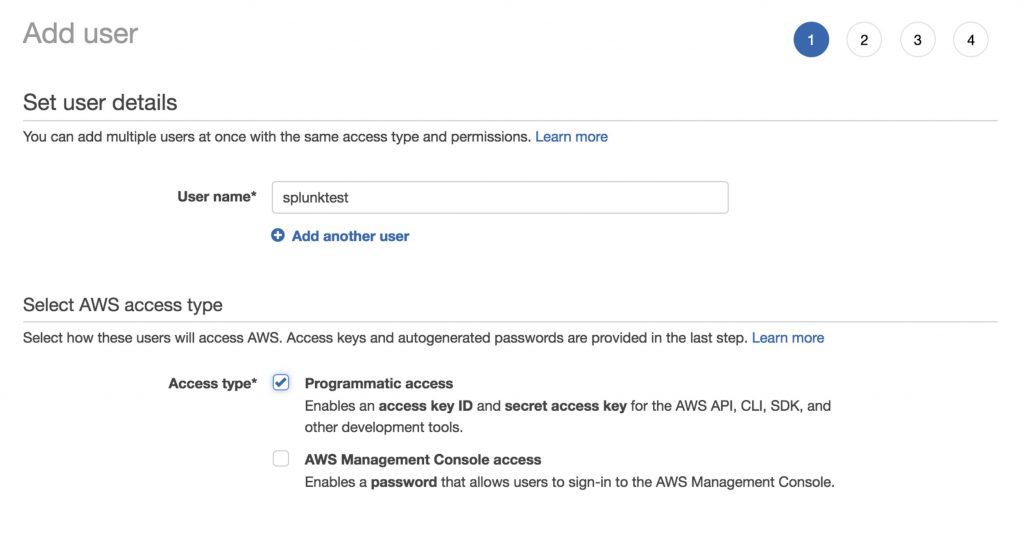
Go toService->IAMAdd User and create a new user account for Splunk. Splunk cloud requires a programmatic user account to access log resources within AWS. This account will only have permission to assume a role (which we will create in a later step) with the necessary permissions. Click the Next, Add permissions button in the bottom right corner.
Step 2:
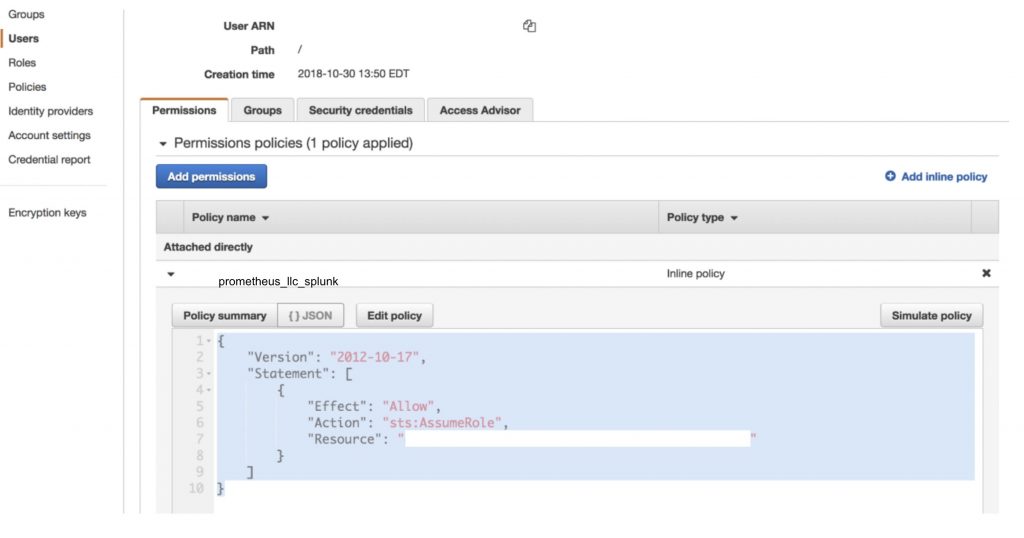
Attach an inline policy similar to below granting the “
Step 3:
Create a role for the
(Example IAM policy which will cover the majority of access splunk should need within AWS)
{
“Version”: “2012-10-17”,
“Statement”: [
{
“Effect”: “Allow”,
“Action”: [
“sqs:GetQueueAttributes”,
“sqs:ListQueues”,
“sqs:ReceiveMessage”,
“sqs:GetQueueUrl”,
“sqs:SendMessage”,
“sqs:DeleteMessage”,
“s3:ListBucket”,
“s3:GetObject”,
“s3:GetBucketLocation”,
“s3:ListAllMyBuckets”,
“s3:GetBucketTagging”,
“s3:GetAccelerateConfiguration”,
“s3:GetBucketLogging”,
“s3:GetLifecycleConfiguration”,
“s3:GetBucketCORS”,
“config:DeliverConfigSnapshot”,
“config:DescribeConfigRules”,
“config:DescribeConfigRuleEvaluationStatus”,
“config:GetComplianceDetailsByConfigRule”,
“config:GetComplianceSummaryByConfigRule”,
“iam:GetUser”,
“iam:ListUsers”,
“iam:GetAccountPasswordPolicy”,
“iam:ListAccessKeys”,
“iam:GetAccessKeyLastUsed”,
“autoscaling:Describe*”,
“cloudwatch:Describe*”,
“cloudwatch:Get*”,
“cloudwatch:List*”,
“sns:Get*”,
“sns:List*”,
“sns:Publish”,
“logs:DescribeLogGroups”,
“logs:DescribeLogStreams”,
“logs:GetLogEvents”,
“ec2:DescribeInstances”,
“ec2:DescribeReservedInstances”,
“ec2:DescribeSnapshots”,
“ec2:DescribeRegions”,
“ec2:DescribeKeyPairs”,
“ec2:DescribeNetworkAcls”,
“ec2:DescribeSecurityGroups”,
“ec2:DescribeSubnets”,
“ec2:DescribeVolumes”,
“ec2:DescribeVpcs”,
“ec2:DescribeImages”,
“ec2:DescribeAddresses”,
“lambda:ListFunctions”,
“rds:DescribeDBInstances”,
“cloudfront:ListDistributions”,
“elasticloadbalancing:DescribeLoadBalancers”,
“elasticloadbalancing:DescribeInstanceHealth”,
“elasticloadbalancing:DescribeTags”,
“elasticloadbalancing:DescribeTargetGroups”,
“elasticloadbalancing:DescribeTargetHealth”,
“elasticloadbalancing:DescribeListeners”,
“inspector:Describe*”,
“inspector:List*”,
“kinesis:Get*”,
“kinesis:DescribeStream”,
“kinesis:ListStreams”,
“kms:Decrypt”,
“sts:AssumeRole”
],
“Resource”: [
“*”
]
}
]
Step 4:
Click the “Review Policy” button in the bottom right hand corner to create the policy. this will associate the policy with the splunk role. Next, Give your role a name and brief description as shown below and click the “create role” button.

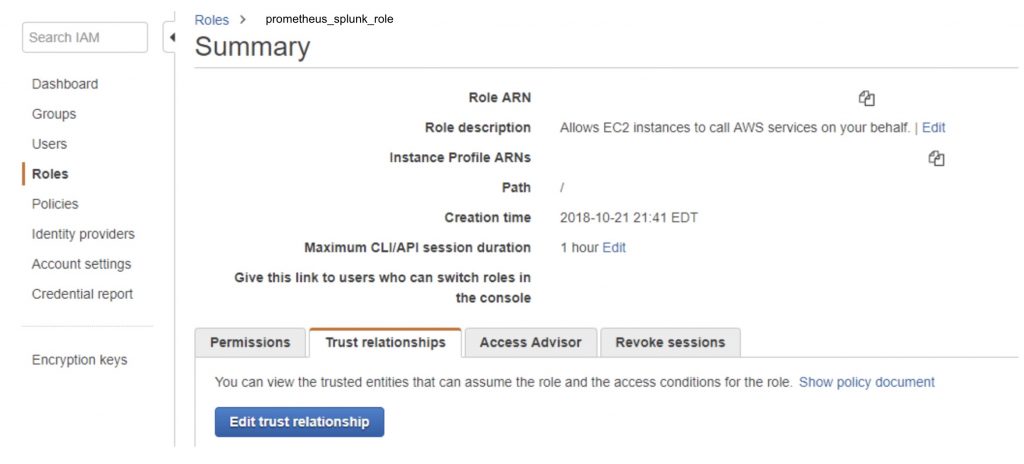
Step 5:
Go back to roles, find the role you just created and select it to go into the configuration details as shown below:

Step 6:
Once inside the role configuration, select the trust relationships tab, and click the”edit trust relationships” button. We are going to add the ARN for the
Step 7:
Add the policy below replacing the user ARN with the
{
“Version”: “2012-10-17”,
“Statement”: [
{
“Effect”: “Allow”,
“Principal”: {
“AWS”: “<add splunk user arn here>”
},
“Action”: “sts:AssumeRole”
}
]
}
Step 8:
Go back to users, select the
{
“Version”: “2012-10-17”,
“Statement”: [
{
“Effect”: “Allow”,
“Action”: “sts:AssumeRole”,
“Resource”: “<add splunk role arn here>”
}
]
}
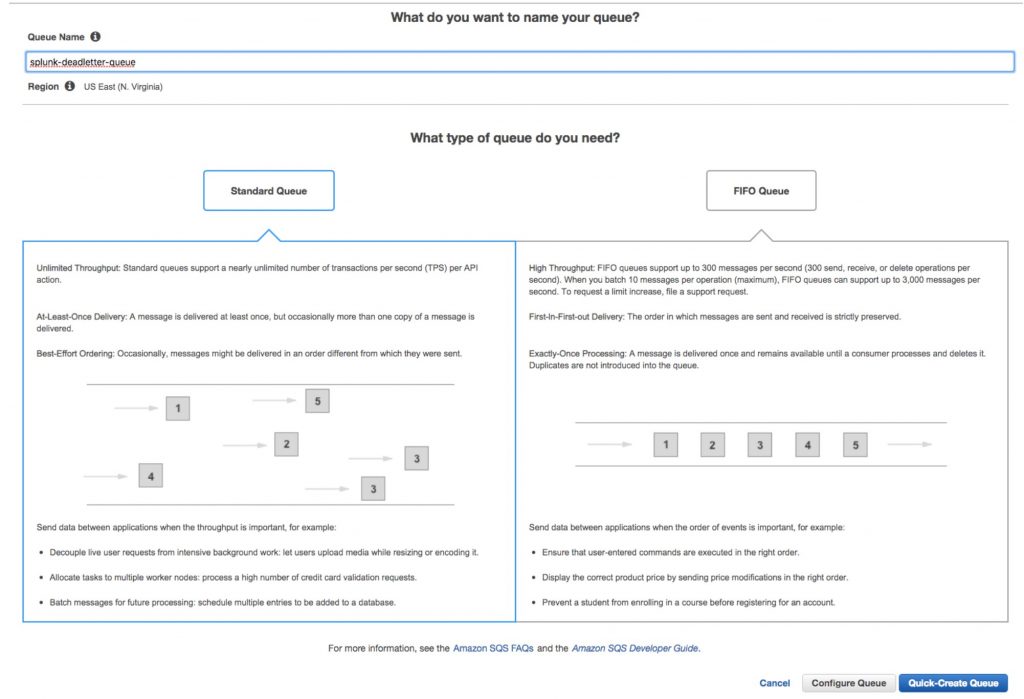
Step 9:
Now that we have the Splunk user created along with the role it will assume with all of the necessary permissions, it’s time to create the SQS queues. Two queues will be required. One queue will be the dead letter queue for error messages to be kicked over to and the other will be the queue used to capture the S3 notifications when a new Cloud trail event is sent to the S3 bucket. Select the SQS service, and click the create new queue button. Select the Standard queue option, give the queue a name similar to below, and click the “Quick-Create-Queue” button:
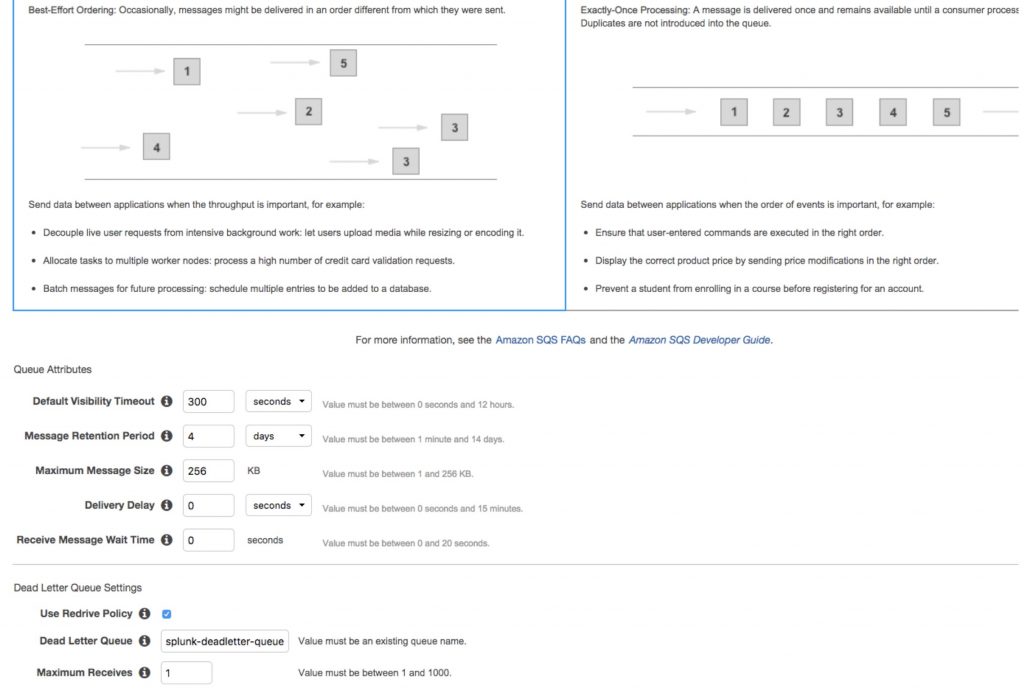
Step 10:
Now follow the same steps to create another queue except this time, click the “ConfigureQueue” button to go into the queue configuration. Here, set the Default visibility timeout to five minutes, check the box for “Use RedrivePolicy”, add the name for the dead letter queue to the “Dead Letter Queue” field, and set “maximum Receives” to 1:
Step 11:
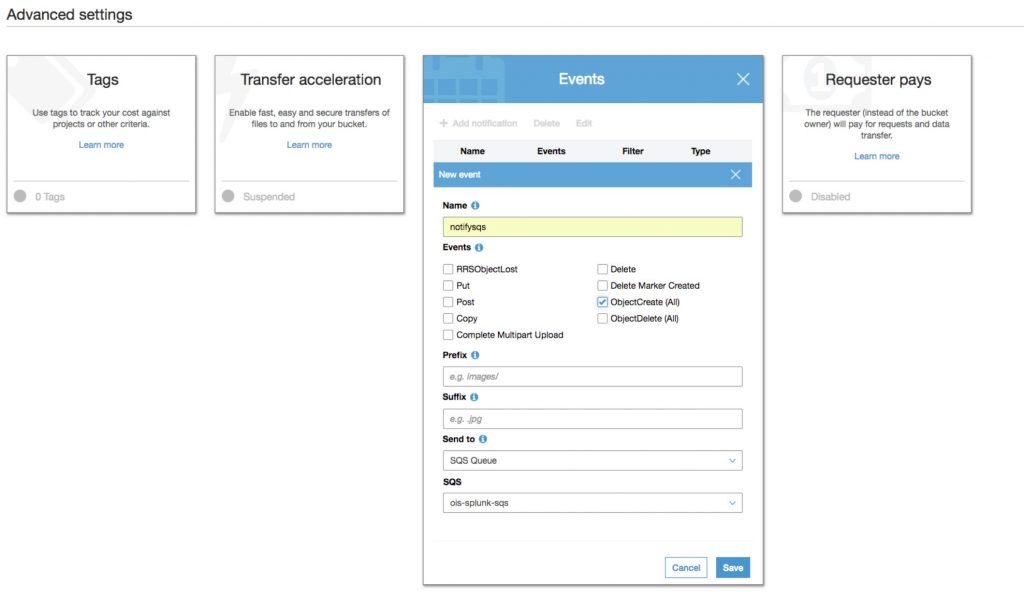
Now that we have the queues set up, create the S3 bucket we will copy the cloud trail events to and configure the events settings similar to below in order to send all of the
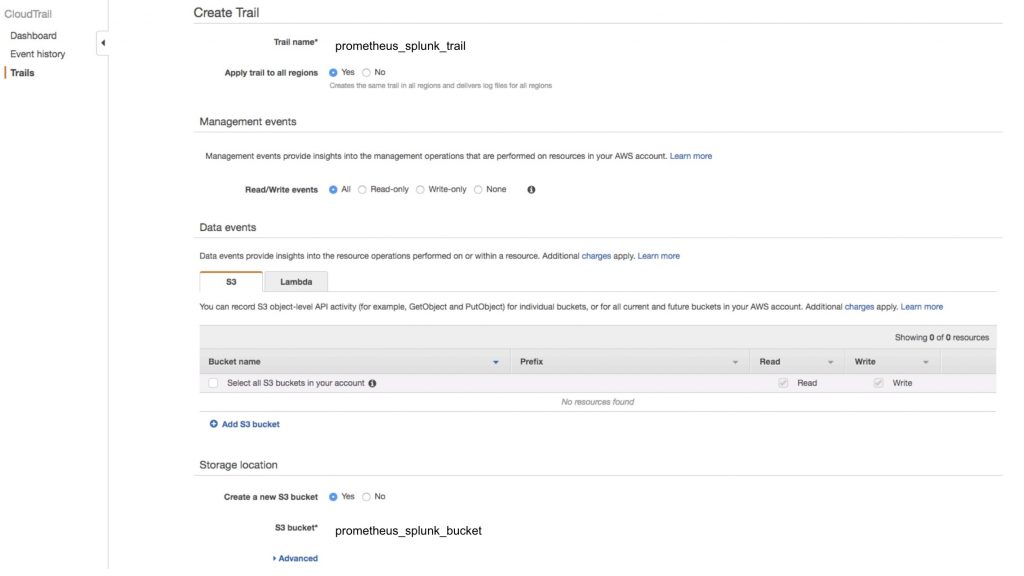
Step 12:
Now we are ready to set up a new
Step 13:
Now it’s time to set up Splunk cloud. Log in to
Step 13a: Go to “Splunk Apps and
“Splunk Add-on for AWS” app.
Step 13b: ” Click the “Add Data” button
Step 13c: Click on the Configuration tab
Step 13d: the “Account” tab should already be select. Click the “Add” button. Give the
Step 13e: Select the IAM role tab, and paste in the
Step 14:
Configuration is now complete. Now, simply select search in the Splunk toolbar and you should see a host populated under what to search. select the host to start searching the