
In our previous article, we discussed how to stand up your own instance of the Open Source IPAM (IP Address Management) application called NSOT (Network Source of Truth) and run it as a Docker container. Today, we are going to start the process of creating a production ready NSOT application in AWS, completely automated via Terraform. Because there is so much to cover in deploying an environment this size, we are going to break this up in to into individual, repeatable blocks of Terraform code called modules. This article will cover deploying the VPC module which we will eventually tie in with the rest of the environment we create in the next article(s). At the end of this series, you will have a fully functional, highly available, NSOT IPAM deployment to hack away on or even deploy to production. Ok, enough talk, let’s start automating!
This Terraform template uses the concept of modules. Modules in Terraform are self-contained packages of Terraform configurations that are managed as a group. There will be a total of six modules used in this lab but today, we will concentrate on the VPC module. The VPC module creates a VPC with public and private subnets. The public subnets will be used for the Elastic Load Balancer and bastion host. They are assigned to the public facing routing table which has the Internet Gateway attached. This allows reachability over the internet to resources within the public subnets. The private subnets will be used for EC2 instances running the NSOT application servers (placed behind the ELB) as well as the Amazon RDS instance running the MySQL DB backend. The private subnets reside in the private route table and are not directly accessible from the internet.
Terraform Code Breakdown:
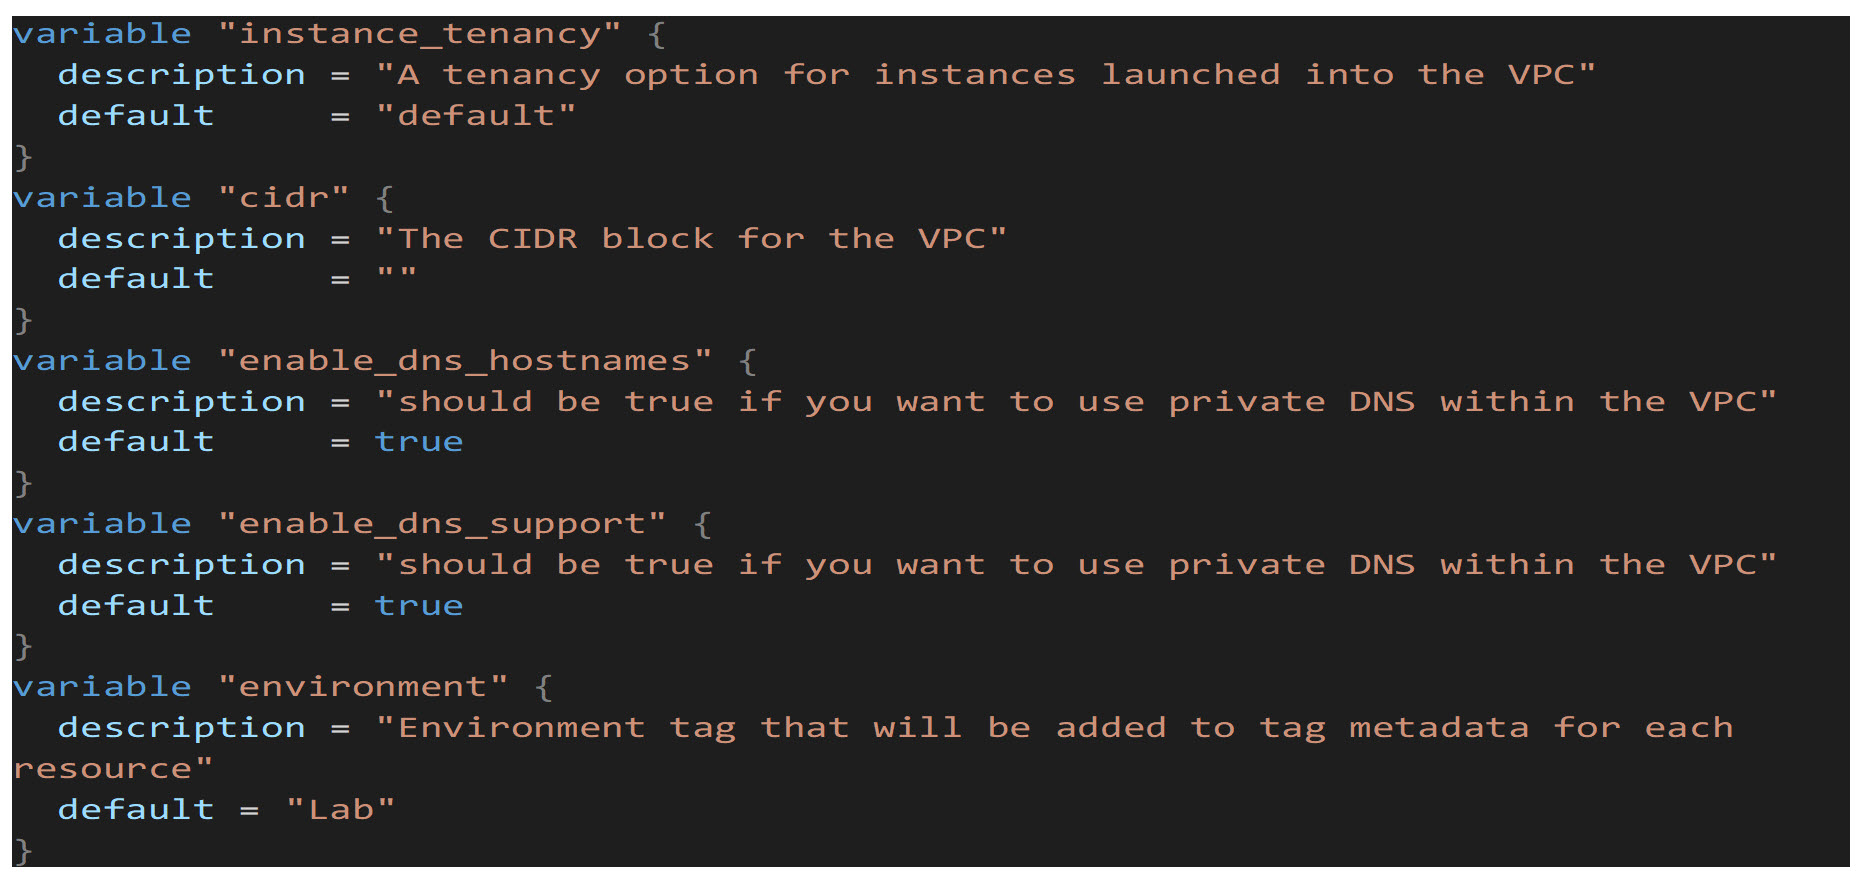
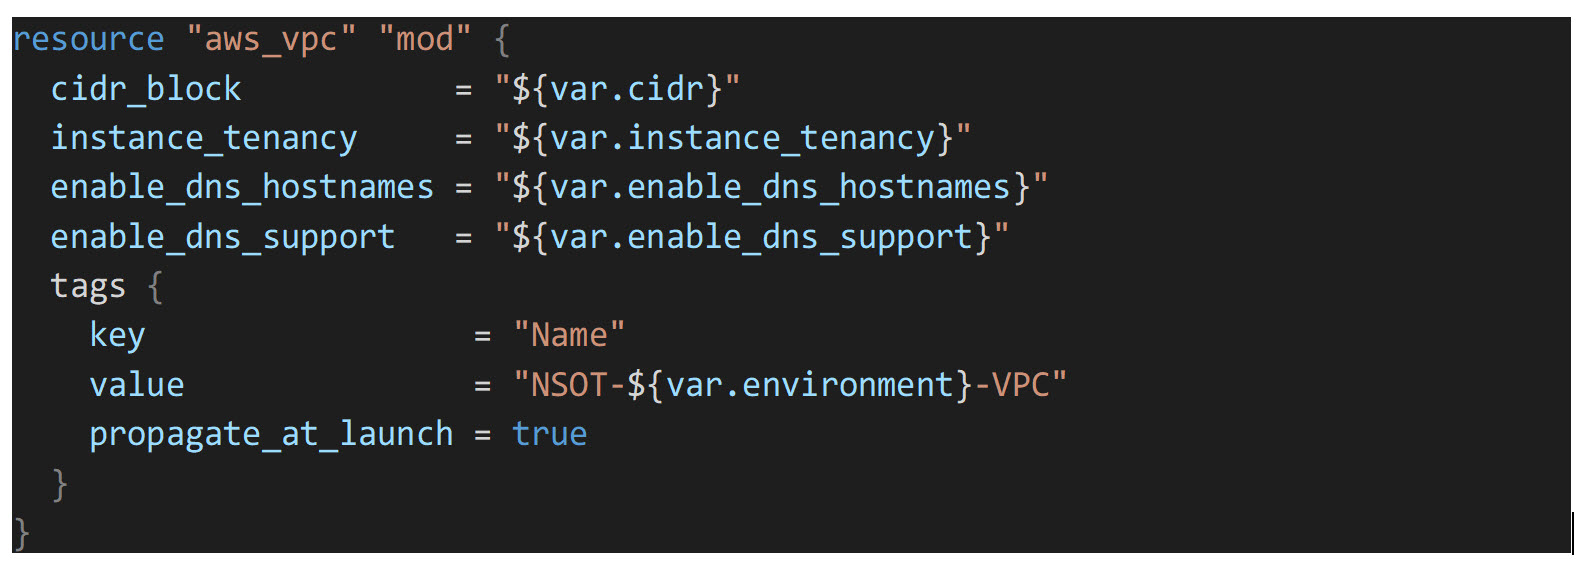
First, we will create the VPC resource. This creates a single VPC (Virtual Private Cloud) which contains all the necessary AWS resources to run the NSOT application. The first block of code shows the variables that will be used, and the second block is the Terraform resource code that creates the actual VPC resource:
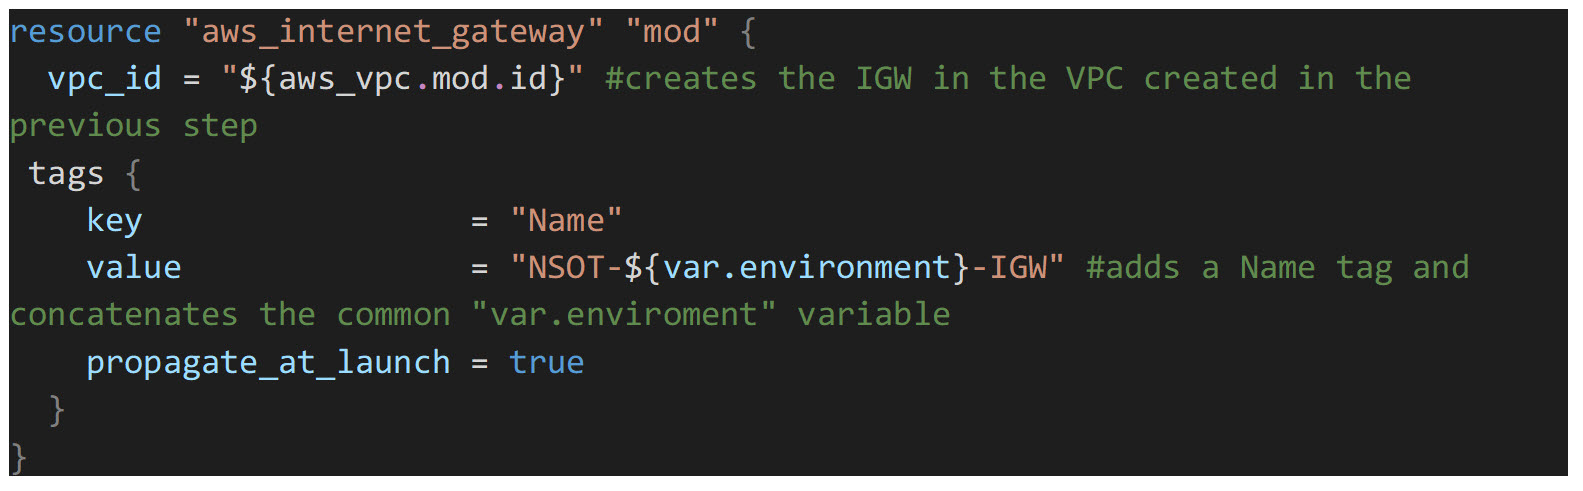
Next, we will create the internet gateway. This will be assigned to the public routing table allowing external ingress/egress internet access *only* from instances that have been assigned an IP from a public subnet.
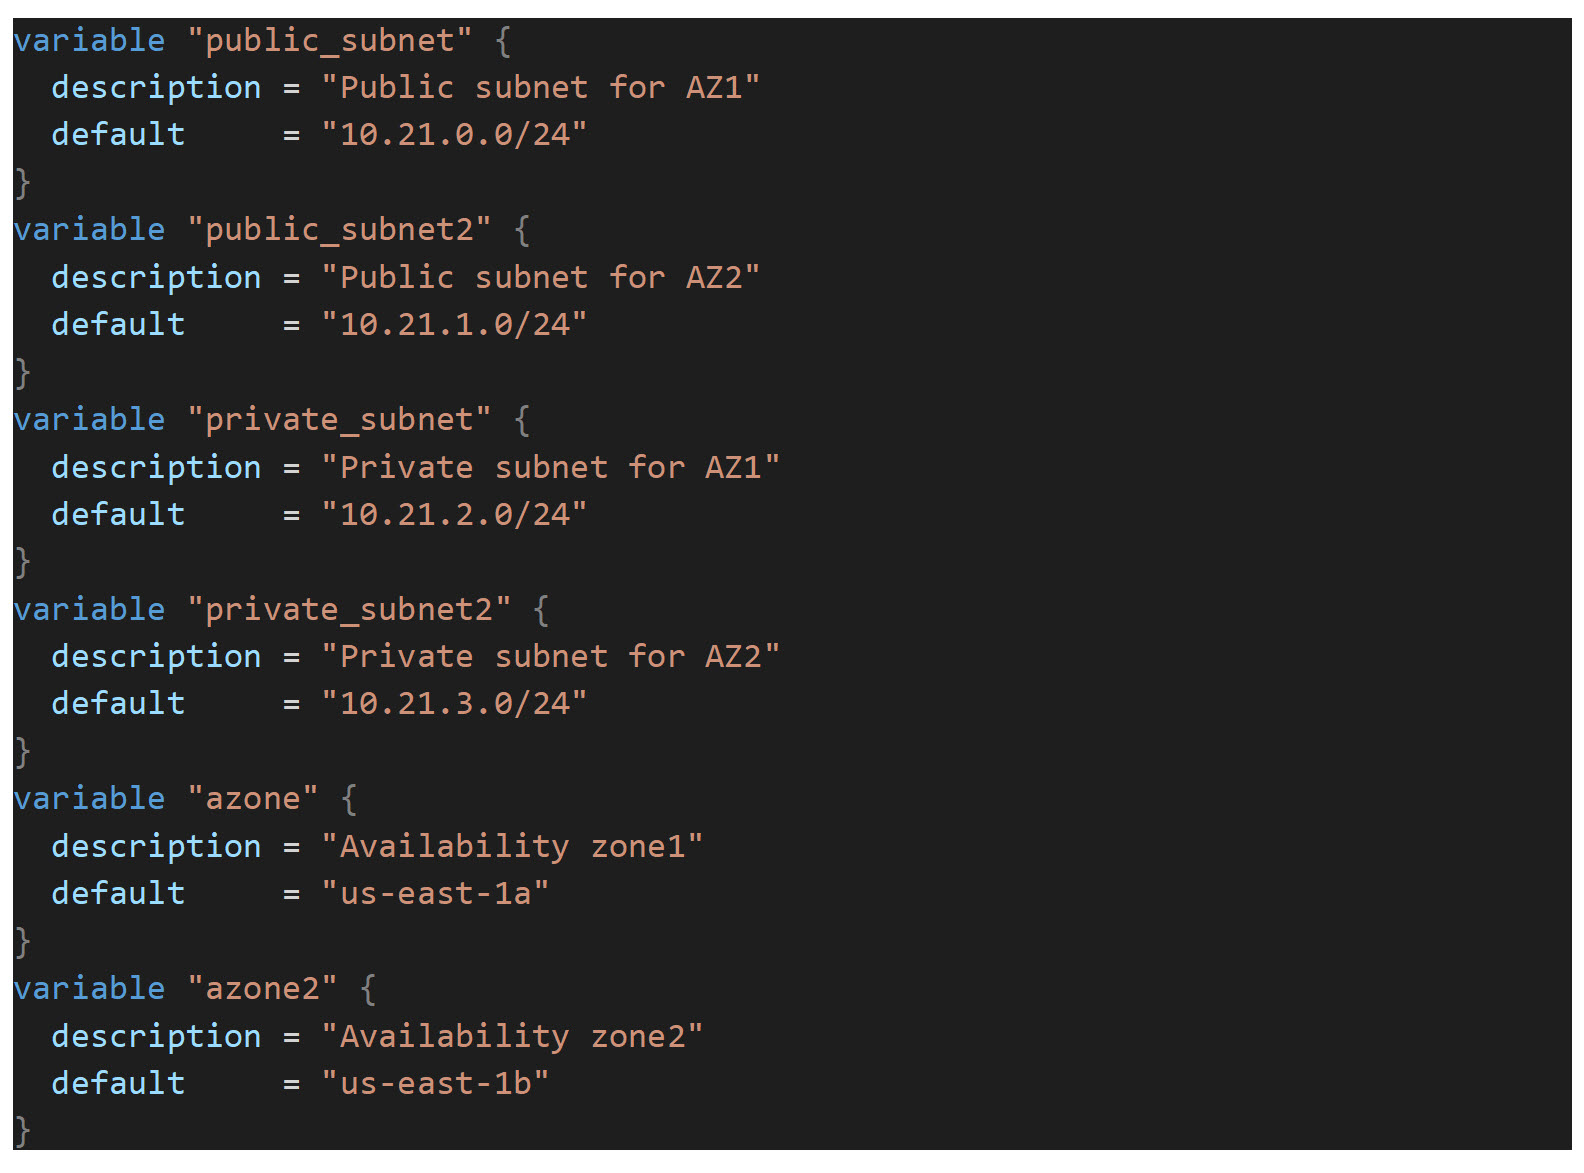
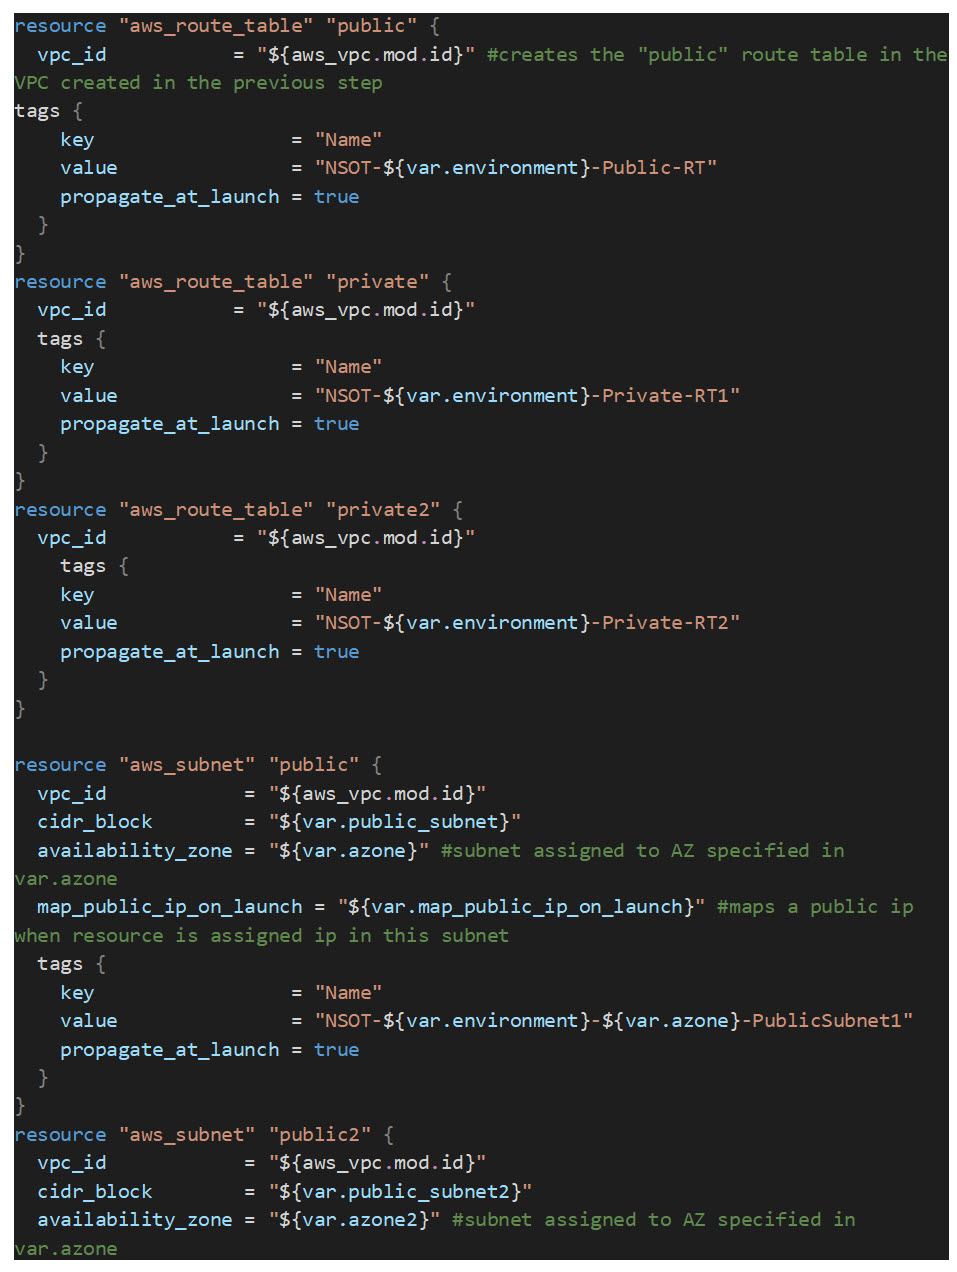
Next, we will create three route tables and four subnets. One route table will be created for public (internet-facing) resources, and the other two for private resources that will only be accessible from a proxied connection through an ELB (Elastic Load Balancer) or through a jumpbox/management host created later in this series of articles. We create two private route tables because we will be creating a redundant, isolated NSOT application EC2 instances and a redundant RDS instance split across two AZs. In AWS, A subnet can only exist in a single availability zone:
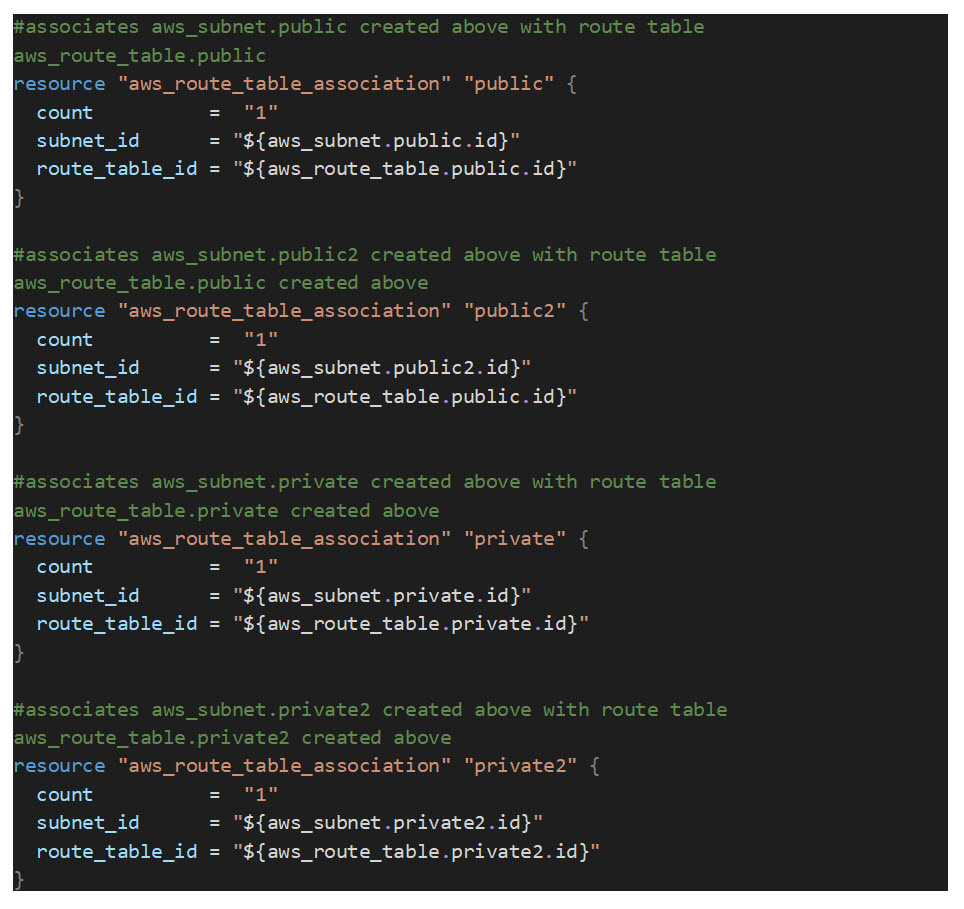
Once the route tables and subnets are created, they need to be associated with the appropriate route tables:
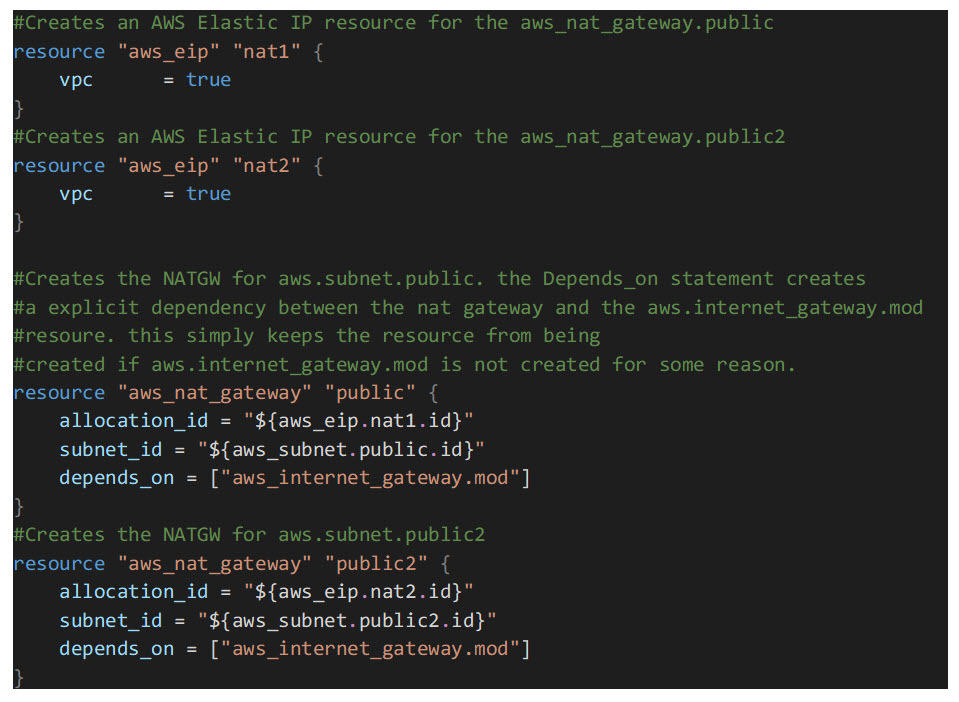
Now that the subnets have been created and associated with the appropriate route tables, it’s time to create two NGW’s (NAT Gateways). You can use a network address translation (NAT) gateway to enable instances in a private subnet to connect to the internet or other AWS services, but prevent the internet from initiating a connection with those instances. We are creating one NAT gateway per private subnet. For the NGW to make an outbound connection to the internet, an EIP (Elastic IP) resource must also be created. An Elastic IP address is a public IPv4 address, which is reachable from the internet:
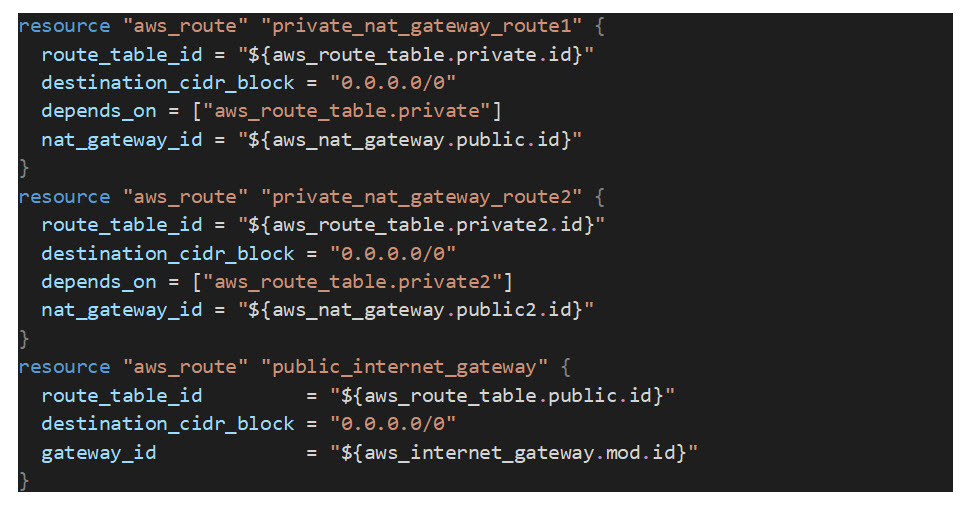
The last resources we will need to create in this module are the default routes in the private subnet route tables. The default routes below will force all traffic destined for the internet from EC2 instances in the private subnets out through the NAT Gateways above.
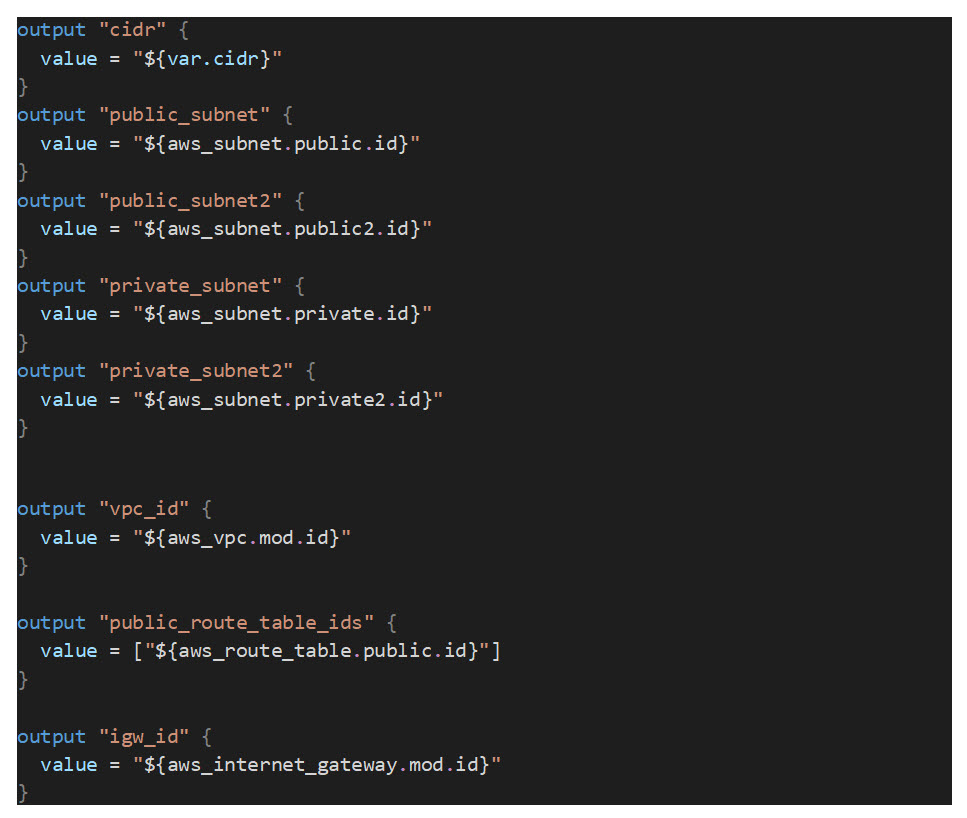
Now that all of the Core VPC resources are created, we need to create output variables for any resource information we want to be able to pass to the other modules we will be creating later in this series.
Great! Now we have everything we need to create a reusable VPC module. In the next article, I will show you how to deploy this to AWS and pass in custom values to the variables. Please feel free to clone the Prometheus Git repo to pull down your own copy of the code.